In today’s technology era, we all know how important it is to host applications in the cloud environment especially for large-scale companies. According to many survey data, both public and private cloud usage ratio have increased considerably, especially in the last two years.
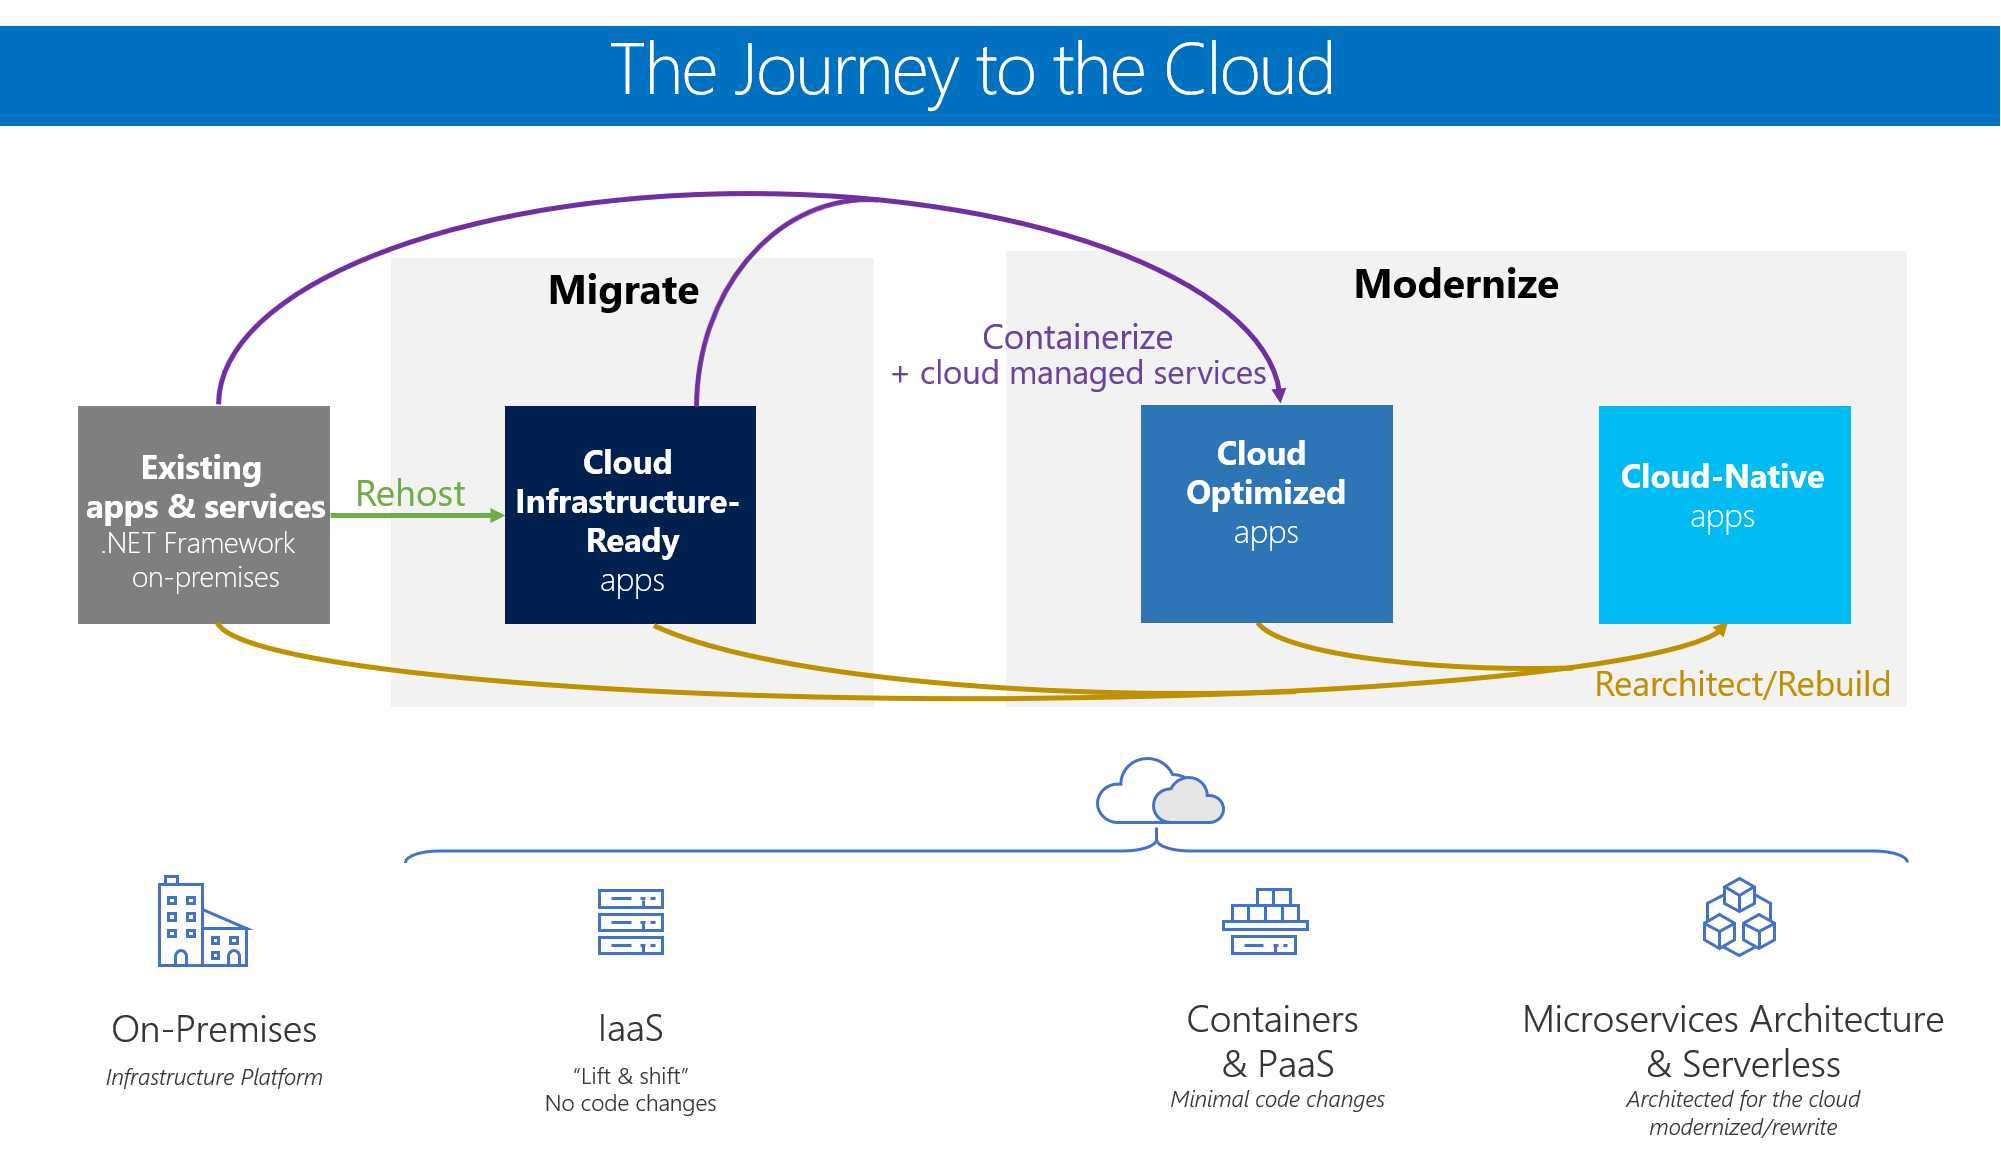
There are several main reasons to transition to the cloud, some of them:
- Lower cost: with the right choices, IT and operational costs can be reduced considerably.
- Scalability: existing resources can be easily expanded. Perhaps it is one of the most important reasons.
- Resiliency/High Availability: with the transition to the cloud, additional hardware requirements, which taken for failures, can also be eliminated.

REF: https://vmokshagroup.com/wp-content/uploads/2015/08/Save-money-date-and-time-using-cloud.png
So, we make an effort that our newly developed applications are containerized cloud-native applications as much as possible. With container-orchestration platforms such as Kubernetes, we also manage applications.
Well, what about existing applications?
While we can easily migrate our applications, which are developed with .NET Core, to platforms such as kubernetes, this process can be a bit more challenging for existing applications developed with .NET Framework.
In general, while the transformation process of applications to .NET Core can be a highly preferred option, unfortunately sometimes it cannot be an option when the time and costs are considered.
In this article context, I want to mention how we can host existing applications, which are developed with .NET Framework, on Azure Kubernetes Service as containerized without doing redesign/redevelopment.
Migrating .NET Framework Applications to AKS
It is possible to host existing .NET Framework applications on Azure Kubernetes Service by creating windows containers without porting to .NET Core.
Just the size of the base image quite large in comparison with .NET Core since the Windows Server Core image takes place in the container. Fortunately, at the end of 2019, this image size was considerably reduced by around 40%. You can reach detailed information about this topic from here.
Creating an AKS Cluster
In order to create and use Windows Server containers on AKS, the “aks-preview CLI” extension and the “WindowsPreview” feature must be enabled.
With this feature, we will be able to add windows server nodes into the node pool.
To do that, let’s follow these steps which take a place under the “Install aks-preview CLI extension” and “Register Windows preview feature” sections.
NOTE: It may take several minutes for the “WindowsPreview” feature to be enabled within the Azure subscription.
After activation of the extension and feature, we can start to create AKS cluster operations via CLI by creating a resource group as follows.
NOTE: First, don’t forget to log in the corresponding Azure subscription via CLI.
az group create -n my-aks-rg -l westeurope
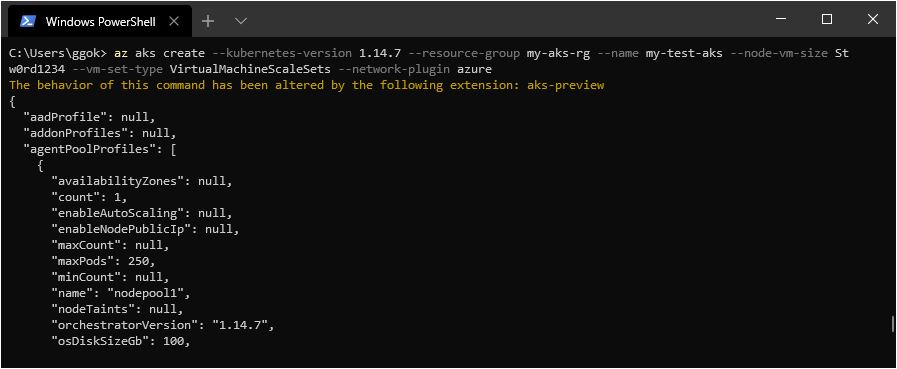
az aks create \
 --kubernetes-version 1.14.7 \
 --resource-group my-aks-rg \
 --name my-test-aks \
 --node-vm-size Standard_D2_v2 \
 --node-count 1 \
 --max-pods=250 \
 --location westeurope \
 --generate-ssh-keys \
 --windows-admin-username testadmin \
 --windows-admin-password P@ssw0rd1234 \
 --vm-set-type VirtualMachineScaleSets \
 --network-plugin azure
After AKS cluster creation operation is completed successfully, we should see a response like below.
Now we need to run the command below to be able to add windows node into the cluster.
az aks nodepool add
    --resource-group my-aks-rg \
    --cluster-name my-test-aks \
    --os-type Windows
    --name npool2 \
    --node-vm-size Standard_D2_v2 \
    --node-count 1 \
    --kubernetes-version 1.14.7
After this operation, in order to connect to the cluster, let’s configure the kubectl as follows.
az aks get-credentials --resource-group my-aks-rg --name my-test-aks
Then, let’s use the command below to see the nodes we have added, with “OS” label.
kubectl get nodes --label-columns beta.kubernetes.io/os
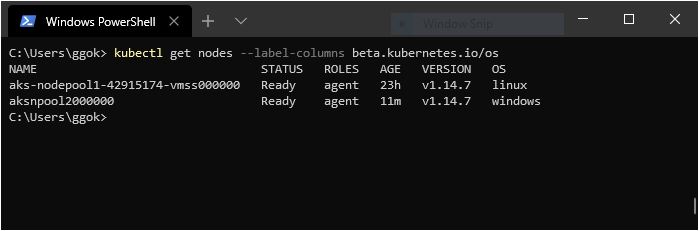
As we can see at the picture above, the windows node has been added successfully. Thus, we have completed the operation of creating AKS cluster with windows node.
Containerization of ASP.NET Framework Web Application
I will create a simple ASP.NET Framework Web Application(4.8) project called “MyOldTodoAPP” for demonstration purposes. If you wish, you can use your existing .NET Framework applications.
Before dockerizing the application, let’s build and publish it outside the container as follow.
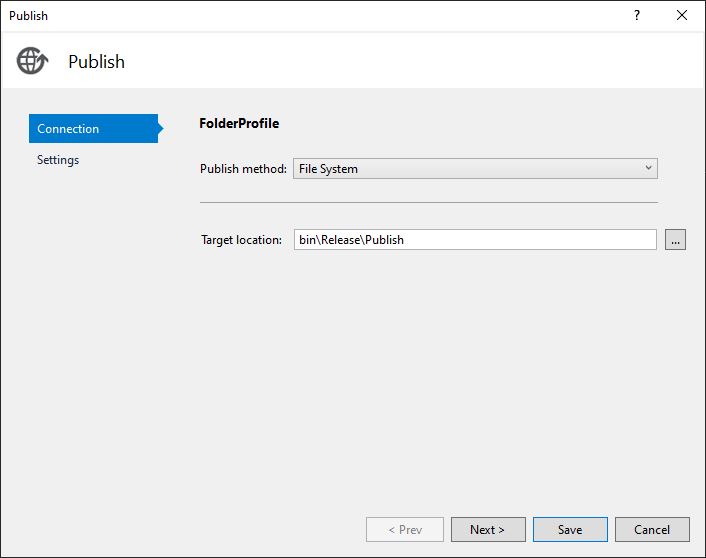
Building the application outside of the container would be a better choice for the windows container option.
After publishing the project, let’s create a “Dockerfile” under the related publish folder as follow:
FROM mcr.microsoft.com/dotnet/framework/aspnet:4.8-20191210-windowsservercore-ltsc2019
COPY . /inetpub/wwwroot
The only important thing here is, the OS version of the base image, which we will use in the container, should be compatible with the OS version of the host. Detailed information is available here.
We can get the OS version of the windows node from the Azure portal or via the following command line.
kubectl get nodes -o wide

NAME                                STATUS   ROLES   AGE     VERSION   INTERNAL-IP    EXTERNAL-IP   OS-IMAGE                         KERNEL-VERSION      CONTAINER-RUNTIME
aks-nodepool1-42915174-vmss000000   Ready    agent   3d11h   v1.14.7   10.240.0.4             Ubuntu 16.04.6 LTS               4.15.0-1066-azure   docker://3.0.8
aksnpool2000000                     Ready    agent   2d12h   v1.14.7   10.240.0.255           Windows Server 2019 Datacenter   10.0.17763.737      docker://19.3.2
With this base image, “.NET Framework Web“, “MVC“, “Web API” and “SignalR” applications can run in a container.
In addition, we didn’t configure an entrypoint in the dockerfile since the IIS process is configured as “entrypoint” in the “ASPNET” base image.
Now we can start dockerizing the application. To do this, we need to run the following command line via CLI under the relevant publish folder path.
docker build -t my-existing-app .

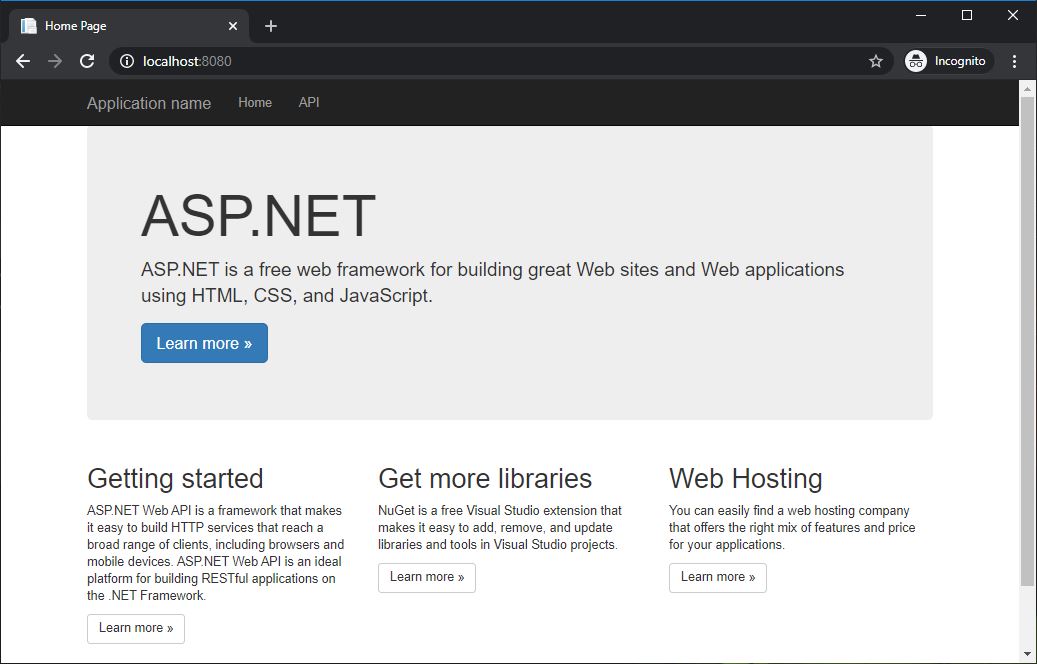
To ensure that everything works before deploying to AKS, let’s run and test the application, which we containerized, through the “8080” port as follow.
docker run -d -p 8080:80 my-existing-app

If everything goes well, we should see the default ASP.NET response like below.
Now let’s tag the container and send it to the container registry as follow.

Deployment Operations of the Container
In order to deploy the container we created to the AKS, let’s create a “yaml” file called “deploy-to-aks” as follow.
apiVersion: apps/v1
kind: Deployment
metadata:
  name: sample
  labels:
    app: sample
spec:
  replicas: 1
  template:
    metadata:
      name: sample
      labels:
        app: sample
    spec:
      nodeSelector:
        "beta.kubernetes.io/os": windows
      containers:
      - name: my-app
        image: mytestaksregistry.azurecr.io/my-existing-app:1.0
        resources:
          limits:
            cpu: 1
            memory: 800M
          requests:
            cpu: .1
            memory: 300M
        ports:
          - containerPort: 80
  selector:
    matchLabels:
      app: sample
---
apiVersion: v1
kind: Service
metadata:
  name: sample
spec:
  type: LoadBalancer
  ports:
  - protocol: TCP
    port: 80
  selector:
    app: sample
The important thing here is, the value of the “nodeSelector“, which locates under the “spec“, is set as “windows“. In this way, the container will be run in a node pool which is windows node. In addition, don’t forget to update the value of the “image” property using the container tag.
Let’s execute this yaml file via CLI and start the deployment process as follows.
kubectl apply -f deploy-to-aks.yaml
Then, we need to wait until the status of the corresponding pod is “Running“. To see that, we can use the following command line. This can take a few minutes since AKS will pull the corresponding container image for the first time and the size of the image is slightly large.
kubectl get pods -w

After the container status has changed to “Running“, let’s get the load-balancer IP address of the container, that the container exposed outside, by using the command below and test it via the browser.
kubectl get svc
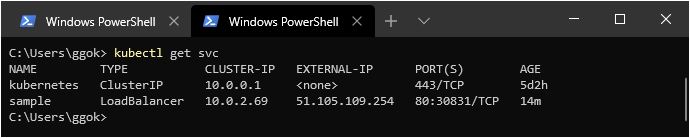
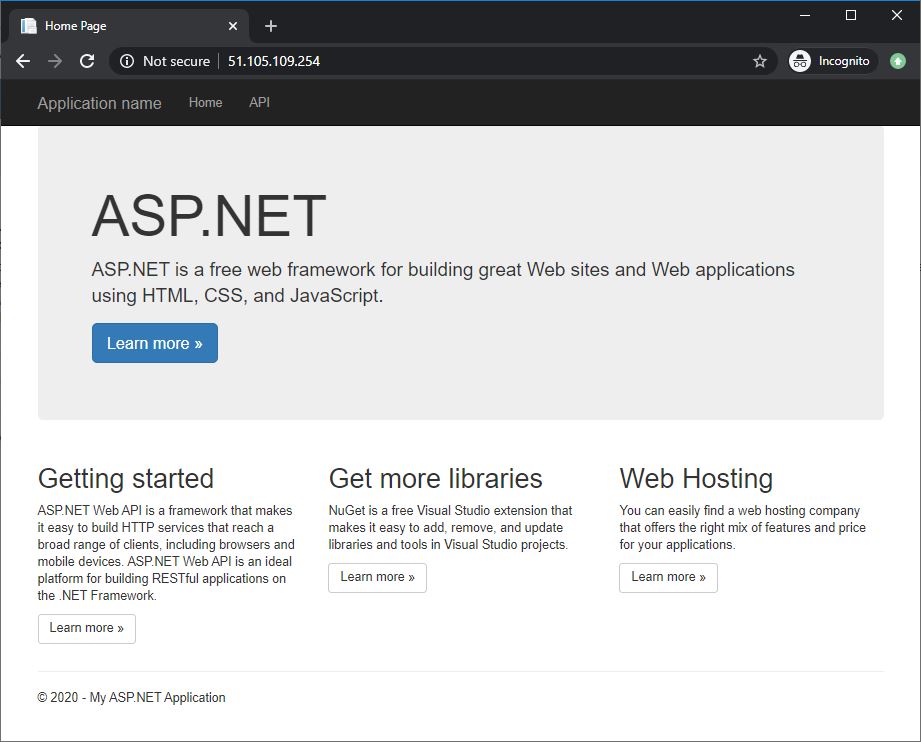
As we can see, we have been able to access the .NET Framework application on AKS, that we containerized, successfully via external IP address.
Conclusion
Although the Windows node feature is currently a preview for AKS, I think it is expected to become globally available in the next few months. In addition, Microsoft also provides some customer support partially. In my point of view, it’s a great option to containerize and host our old applications without any extra effort.
Referanslar
https://docs.microsoft.com/en-us/azure/aks/windows-container-cli?WT.mc_id=AZ-MVP-5003382
https://docs.microsoft.com/en-us/aspnet/mvc/overview/deployment/docker-aspnetmvc?WT.mc_id=AZ-MVP-5003382
Thanks Gökhan nice job ;)