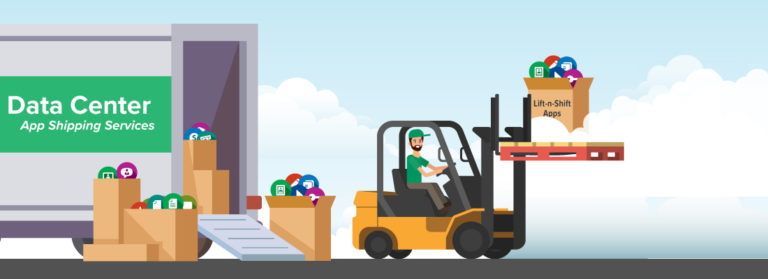
As we can imagine, trying to migrate existing applications to the cloud environment with the lift & shift approach due to time and cost reasons, is sometimes not as easy as we think. Especially if we want to host and manage the existing applications, that we have developed with .NET Framework, as containerized in environments such as kubernetes. In addition, we may also need to handle different challenges that we often cannot foresee.
I have been working on Windows Container for about 1 year. During this period, we faced many different challenges and experienced different solutions. In this article context, I will try to share some of the useful information and my notes related to windows containers.
Choosing Base Windows Container Image
Maybe one of the most important topics is the choice of the base windows container image. If you are just starting to work with Windows containers, this process can be a bit confusing due to different types of base windows container images (Windows Server Core, Nano Server, Windows IoT Core, Windows) and versions.
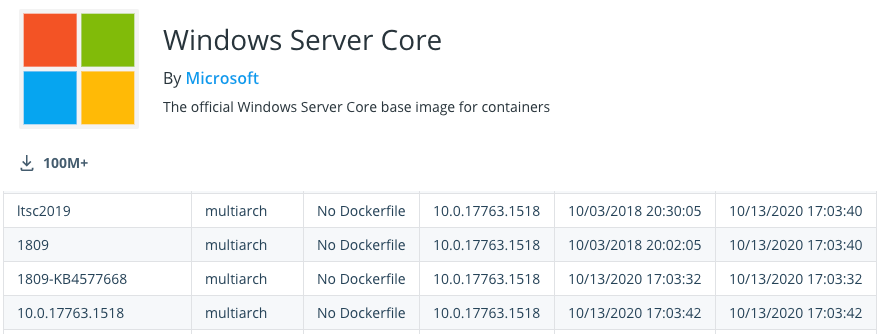
If our existing applications require full .NET Framework, we need to use a Windows Server Core-based base image.
Another point is the support lifecycle of the image we will choose. For example, if you take a look at the tags for windows server core from here, you can see that there are two different release channels as “LTSC” and “SAC”. At this point, choosing one of the “LTSC” (Long-Term Servicing Channel) tags will be beneficial to us.
In addition, the version of the container, which we will choose, should be compatible with the version of the host machine. For example, if you want to host your containers on Azure Kubernetes Service (AKS) like me, you need to use a 2019 version-based container image. Because AKS uses Windows Server 2019 as its host OS version.
You can reach out detailed information here.
For example, if we want to containerize a Web API which developed with .NET Framework and host it in AKS, we can use an image as below.
FROM mcr.microsoft.com/dotnet/framework/aspnet:4.8-windowsservercore-ltsc2019If the application we will containerize does not require IIS in it, we can use an image as below.
FROM mcr.microsoft.com/windows/servercore:ltsc2019
FROM mcr.microsoft.com/dotnet/framework/runtime:4.8-windowsservercore-ltsc2019
You can also access other tags from the following links.
- https://hub.docker.com/_/microsoft-dotnet-framework-runtime/
- https://hub.docker.com/_/microsoft-dotnet-framework-aspnet/
Keeping Up-to-date Windows Container
Microsoft also updates the Windows container images periodically like the other operating systems. In order to get these updates, we need to make sure that our applications always pull the latest image during deployment. That’s how we can make sure that the base image has up-to-date security and bug fix updates.
Preparing a Dockerfile
Especially if our existing applications are dependent on some third-party libraries, it can be a little bit challenged to prepare the dockerfile and make the container up. Because sometimes it is not easy to find the silent installation commands of the relevant third-party libraries and run them as we want.
If our applications are dependent on some third-party libraries, we can create a custom base image and use that base image to containerize related applications.
FROM mcr.microsoft.com/dotnet/framework/aspnet:4.8-windowsservercore-ltsc2019
WORKDIR /app

// Third-party dependencies
ADD ./AppPath/DependedLibrary.exe /app

// Silent installation
RUN ./DependedLibrary.exe /install /quiet

// Don't forget to delete when it's done
RUN DEL ./DependedLibrary.exe
Accessing a Running Container
If we want to access a running container and run a command, we can do it in the following way.
docker exec -it container_id cmd/powershell
kubectl exec -it container_id -- cmd/powershell
Configuring TLS
Another challenging topic is the configuring TLS for secure communication of applications.
For example, let’s suppose an existing application developed with the .NET Framework needs to connect a backing service which TLS enabled. For this, we need to add the root ca certificate to the root store of the windows container before the application is started.
We can add the relevant certificate to the Trusted Root store of the operating system by using the “certoc.exe” tool.
FROM mcr.microsoft.com/dotnet/framework/runtime:4.8-windowsservercore-ltsc2019
WORKDIR /app
COPY . .
RUN powershell certoc.exe -addstore root path\\ca.crt
ENTRYPOINT ["MyConsoleApp.exe"]
If we want to install a PFX certificate for SSL in an ASP.NET Framework Web API container, then we need to do a few more things.
At this point, we need to import the certificate using the “Import-PfxCertificate” cmdlet of the PowerShell and bind it to port 443.
We can do this as follows.
FROM mcr.microsoft.com/dotnet/framework/aspnet:4.8-windowsservercore-ltsc2019
COPY . /inetpub/wwwroot

RUN powershell.exe -Command "\
  Import-Module IISAdministration; \
  Import-Module WebAdministration; \
  $pwd = SOME_PASS_HERE | ConvertTo-SecureString -Force -AsPlainText; \
  $cert = Import-PfxCertificate -Exportable -FilePath 'C:\PFX_PATH\FILE' -CertStoreLocation cert:\localMachine\My -Password $pwd; \
  new-item -Path IIS:\SslBindings\0.0.0.0!443 -value $cert; \
  New-WebBinding -name 'Default Web Site' -Protocol https -Port 443; \
  Remove-WebBinding -Port 80; \
  c:\ServiceMonitor.exe w3svc"
If you are deploying to a kubernetes platform, you can make these PowerShell commands reusable in the “deployment.yaml” file of the helm chart that you will be created.
You can get benefit from the “Certificate” resource of the cert-manager and the “Secret” object of the kubernetes during the creation of a password and certificate as follows.
apiVersion: cert-manager.io/v1
kind: Certificate
metadata:
  name: {{ template "my-apis.fullname" . }}
spec:
  secretName: {{ template "my-apis.fullname" . }}-tls
  dnsNames:
    - {{ template "my-apis.fullname" . }}
  keystores:
    pkcs12:
      create: true
      passwordSecretRef:
        key: pfx-password
        name: {{ include "my-apis.fullname" . }}-pfx-secret
  issuerRef:
    name: ca-issuer
    kind: ClusterIssuer
  duration: 8760h
We can also test the SSL along with SNI within any pods as the help of the command below.
curl -k https://MY_API_HOST/PATH --resolve MY_API_HOST:443:SVC_IP
IIS Binding Operations
If we want to list the IIS bindings in the container especially for SSL operations, we can list it like below.
powershell Get-WebBinding 'Default Web Site'
Grabbing Logs
It is not so easy to grab the application logs with the “kubectl logs” command in the Windows container, as in the Linux containers. Thus, sometimes we can spend a lot of time to understand why the application is not working.
Fortunately, we can use the Log Monitor tool developed by Microsoft for windows containers. Log Monitor tool monitors sources such as ETW, Event logs and custom application logs and then makes them accessible for STDOUT.
Thus, we can access logs through the “kubectl logs” command.
You can read the implementation details of the Log Monitor tool from here.
Event Logs
In some cases, we need to take a look at the Windows Event Logs in order to understand where the problem is happening.
For this, we can use the command below.
Get-EventLog -list
Get-EventLog application -newest 1
File Storage
If our existing applications need a shared file storage, we can also benefit from the Azure File Share service.
Azure file share is a fully managed cloud file share service. The best part of it is SMB support. In other words, we are able to mount the azure file share to any container we want without refactoring our existing applications.
You can create Azure file share by following the steps here.
The simplest way to mount the Azure file share is to implement it in the “deployment.yaml” file of the helm chart as follows.
apiVersion: apps/v1
kind: Deployment
metadata:
...
spec:
  ...
  template:
    ...
    spec:
      containers:
        - name: {{ .Chart.Name }}
          image: ...
          volumeMounts:
          - name: azurefileshare
            mountPath: /path
      volumes:
      - name: azurefileshare
        azureFile:
          secretName: storage-secret
          shareName: path
          readOnly: false
      ...
Then, we need to create a “storage-secret” in order to access Azure file share.
apiVersion: v1
kind: Secret
metadata:
  name: storage-secret
  namespace: default
type: Opaque
data:
  azurestorageaccountname: Base64_Encoded_Value_Here
  azurestorageaccountkey: Base64_Encoded_Value_Here
Resource Request Limits
Especially if we are going to use a windows container that includes IIS, more precisely we need to calculate the resource, that the container will allocate, taking into account the IIS.
You can find the information about this here.
Node Selector
While preparing a helm chat for windows container, we need to set “nodeSelector” value to “windows”. If we don’t set this parameter, the pod can be scheduled on any node.
nodeSelector:
  kubernetes.io/os: windows
Health Checks
Another important topic for our applications to run properly in the kubernetes environment is the setting of the “liveness” and “readiness” probes.
Especially for windows containers, we need to set the “readiness” probe more carefully. Because it may take a little more time for the windows container to be able to accept traffic.
Referanslar
https://docs.microsoft.com/en-us/virtualization/windowscontainers/manage-containers/container-base-images?WT.mc_id=DT-MVP-5003382
https://gokhan-gokalp.azurewebsites.net/kubernetes-for-production-some-useful-information/
https://docs.microsoft.com/en-us/virtualization/windowscontainers/deploy-containers/version-compatibility?tabs=windows-server-1909%2Cwindows-10-1909&WT.mc_id=DT-MVP-5003382
Be First to Comment